Showing posts with label Craft. Show all posts

Wednesday, April 15, 2015

Cute Things for Kids

Click HERE for this and other cute food crafts for kids.

When I see cute kid's foods, it sure makes me miss mine being little!  I LOVED making them cute food snacks and meals!  They would think I was crazy if I tried serving them all of these now, so I'll have to wait to make them for my grandchildren when they come to visit in the future!
And then look at this adorable quilt made by Daphne Scott using some of her granddaughter's first year clothes!  I am glad I kept a box for each child!  With those and using their old blankets as edging, it will make very sweet blankets for them to pass down to their own children.  I love this idea!  Of course, someone else will have to sew and quilt it for me, but I still will get it done some day :).


Pin It Now!

Sunday, March 23, 2014

Chevron Bunny Wall Art


While decorating for Spring over "Spring Break", I decided I wanted some kind of bunny wall art.  I decided to look at Pinterest (unusual for me!) for "Easter wall art" or "Bunny Burlap"...something like that. I had this burlap canvas (purchased at Hobby Lobby on sale for $3.00), so planned to use it.

I saw a really cute Chevron fabric bunny, but I didn't have any Chevron fabric. Then I happened to remember that I had bought Chevron napkins and plates for Easter and a ladies' salad supper I'm having  next month.  I figured I could get two bunnies out of each napkin, and I would do two napkins - so four bunnies for my four children. But, to my surprise, there were SIX bunnies that cut out all at the same time! So, I figured I'd make our whole family!

The bunnies were quickly added to the canvas with a dot of hot glue in a few places. The cotton ball was hot glued for the tail. A quick Easter/Spring decoration for less than $4.00!!!
Pin It Now!

Wednesday, January 22, 2014

Using What You Have - Burlap Wall Craft


I have a bad habit of buying craft stuff, but not using it. I think it's because of where we live. We're an hour away from Hobby Lobby, so when I see something I might need, I get it. You just never know when you'll need to make something, so I always want to make sure I have what it takes to make it!
And it might just be because I'm a hoarder. Yes, that's possible, but it doesn't sound as good as the explanation above, so we'll just go with it. :)
So, my goal this year is to use up what I have, as much as possible. And when I wanted some new thing for a black spot on a wall, I remembered this goal and went looking for a solution.
I had a blank canvas, lots of burlap, a pretty roll of burlap ribbon, a faux metal tile backsplash that was kind of warped after falling on a steaming pot of boiling noodles, and a burlap/material flower that was pinned to a lampshade.
I wrapped the canvas with burlap, stapling it into place. Did the same with the burlap ribbon.  I cut the backsplash into a heart shape and hot-glued it into place, then aded the burlap/material flower.  It was a perfect solution to the blank wall and used up several of my extra supplies.  Yay!!!
Pin It Now!

Thursday, March 28, 2013

Baby's Butterfly Footprint

I love any types of crafts that are with baby's hand prints or foot prints!  I just wish that all of these wonderful ideas would have been around when mine were all young!  I do have some sweet ones, though.  They just keep showing new ideas that are precious! 

Here is a sweet one of a butterfly.  If you click on the photo, the photo's owner's FB name is in the bottom left corner.  Here is a blog link for directions, as well:   http://www.sawdustandembryos.com/2011/10/crafting-with-twinfants.html

I think this would also be a great idea for children Bible class or VBS!  I think of "A New Creation" or maybe use during a lesson on the days of Creation.  

Pin It Now!

Friday, March 8, 2013

Burlap Bunny


The burlap wreath I showed how to make last year has undergone another transformation.  This time I added this cute burlap bunny!  I bought this bunny, but I'm showing it in case someone wants to make one themselves.  The wire whiskers sticking out make him extra-cute!

Pin It Now!

Monday, February 11, 2013

Painted Mason Jars

My daughter has been making these cool-looking painted mason jars!  She uses food coloring and Modge Podge.  I'm sure she saw it on Pinterest, but I'm not exactly sure of how she's been doing them. I searched for directions to share with you and found this tutorial from Six Sisters.  Their blog is on my list to the right side of my home page, but HERE is the direct link for the tutorial.

These are perfect for Valentine's Day gifts!  Maybe she'll let me have a few!
Pin It Now!

Thursday, January 31, 2013

Shabby Baby Banner

I've always wanted to make a "shabby" banner, the ones that have strips of torn material and ribbon hanging.  Of course, I realized that stripping the material and tying it would take a little time, but the look makes it all worth it!

This banner was made for a vintage-music themed baby shower. I was thankful to have the burlap BABY pennant taking up some of the space by the time I had torn and tied a while!
For this banner, I used strips of cut burlap, torn muslin, and other torn thin cotton material, and several varieties of ribbon.  (To tear material, snip it where you want to begin, then tear it all the way to the end of the other side.  Be careful not to tear too fast or it will get wider or thinner!) The pennant was cut from burlap.  I actually cut it double so that the fold is hanging over the jute cord.  I cut a piece of poster board and glued it in between the two layers of burlap - just to make it more sturdy.  The chipboard letters were covered with music-themed scrapbook paper and hot glued to the front of the pennant triangles.

The pennant was hung on the fireplace and went home with the parents-to-be for the baby's room. It will be a sweet addition to their other accessories, plus a reminder of the shower anticipating baby's arrival!
Pin It Now!

Tuesday, January 29, 2013

Coffee Filter Pom Pom Balls

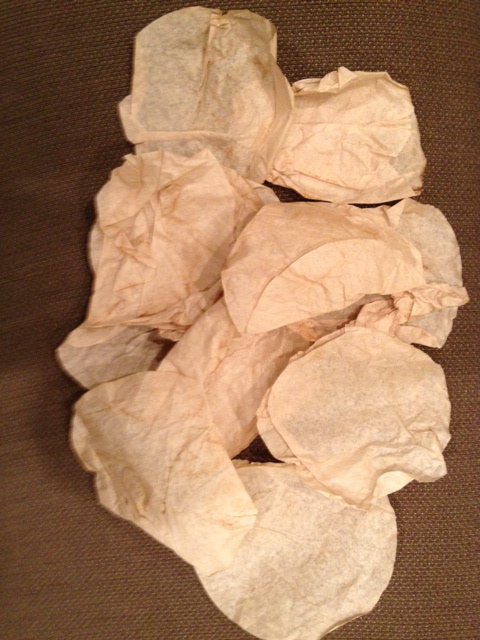
To make vintage looking coffee filter pom pom balls, boil tea bags in a large pot.  Turn off heat and allow the tea bags to set a while.  Place coffee filters in the tea and soak to absorb tea.  I did some for about five minutes and left some in for a day.  
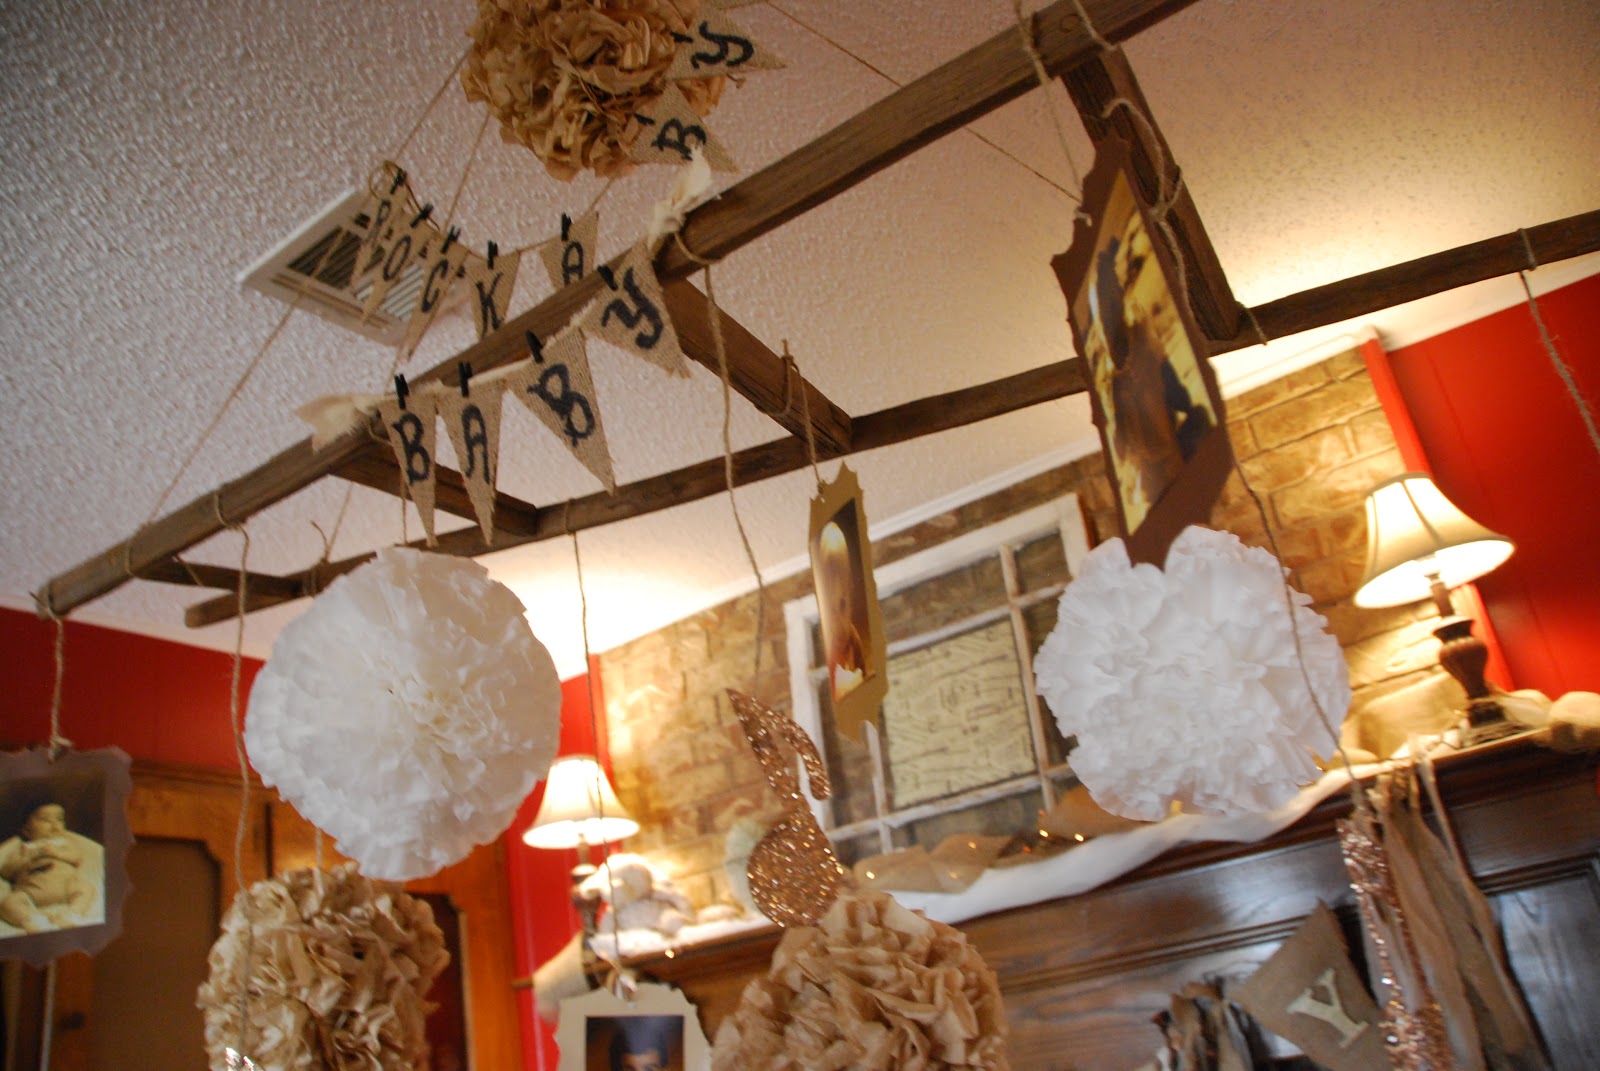
The five minute ones were just ivory colored and the others were as in the picture above and below.  It didn't get any darker, but could have with more tea bags.  Some tea grounds seeped out after a day or so, but it just added colored spots to the filters and made it even neater - so don't worry about that.
Place the wet filters on a cookie sheet or baking pan. It's okay to overlap some, but be sure to pull them apart to hasten drying time.  I put them in a warm oven (to warm setting) for 30 minutes or longer.  Sometimes I would take them out when they weren't completely dry and let them finish drying on the counter.  FYI:  It took over 100 filters to make one pom pom ball!  Thankfully, filters are cheap!
Gather the filter in the bottom center and twist to keep the "flower" in place. I did groups of three together, then secured with a floral pin - which look like a long staple.
This ball was bigger than it appears.  It was big enough so that the floral pin didn't poke out the other side.
For the white pom poms, I just used the filters as they were - without dipping them in a liquid.  If you want them to look more vintage, you could dip them in water, then dry.  I just didn't have the time with the white ones.
Because I used a smaller styrofoam ball for the white pom poms, I used straight pins.  I put three "flowers" together, then inserted them as shown below.
Continue with the filters until the ball is all filled.  Insert a floral pin into the ball, but not all the way down to the ball.  This will be your hanger.  Be sure to wait and do this when you're ready to hang them or tie your string (I used jute) on with the pin....otherwise you might have trouble finding it! (or I would, anyway!)
My pom poms were tied to an old ladder above the table.  A little time consuming, but so much cheaper than the store bought pom poms, plus the vintage look needed for the shower.
Pin It Now!

Tuesday, January 15, 2013

Homemade Gift Week #2 - Hanging Pinecone Decoration

Okay....This is the last sister-in-law gift!  The last few homemade gifts are family, but not sisters-in-law.  This pretty hanging pinecone decoration is simple to make and versatile.  When we first saw these, they were all hanging in a window, by a tension rod.  Imagine how pretty it was having 10 or so of them strung along the window!  So, there's an idea for you.  Of course, one alone is pretty, as well.
Andrea used white spray paint to lightly coat the pinecones and give them a wintery, snowy look.  She then hot glued them to sheer white ribbon, adding snowflakes and more ribbon.  I can think of all kinds of possibilities to do with this example, can't you?  I may do several of these next year for my entry (shown in top picture), where I usually use pinecones and snowflakes.

Thanks, Andrea!
Pin It Now!

Tuesday, January 8, 2013

Homemade Gift Week - Screen Painted Cross

Another homemade gift I want to share with you is this painted cross made out of a screen....like a window screen.  Laura cut the screen with a heavy duty pair of scissors/cutters, then dipped it in brown paint....stencil painted the designs around the edge....and decorated the center by cutting out a flower design and curling the edges.  She finished the look with some flat stones and put a wire on top to hang.  So pretty,  and lots of possibilities for other crafts done in this way! 

Pin It Now!

Friday, November 30, 2012

Mommy's Helpers Reindeer Apron

First I want to apologize for the quality picture.  It's hard to see what I'm trying to show you, but just imagine it, if you will.  

I got this idea from my sister-in-law.  She has an apron with her children's handprints/footprints making reindeer just like I do, except that it is on a white/red/green striped apron (I think!).  I chose to do a red apron several years ago, when my children were younger. It's a little dark for the project, so a lighter color of apron would be better.  I remember being in a rush and not taking time to make sure the paint was on their hands and feet really good.  I also didn't heat-set the pain after it dried, so it's faded some. 

Under each reindeer I have the child's name and age painted. My daughter's reindeer has a holly and berry on top of the reindeer head to make it more girly.

No, the quality isn't quite as good as it should be.  I should have planned ahead instead of rushing the craft.  But it's my children's handprints and footprints.  It's a special treasure and keepsake, in my opinion! It hangs in my kitchen every Christmas.
Pin It Now!

Tuesday, November 13, 2012

"Coke' Float Centerpieces


At a recent youth retreat, the crafts were based on the '50's theme.  These "Coke" floats are easy to put together and the teens really enjoyed making them.  

You will need the following supplies:

White silk carnations
Light brown shredded paper
Red glittery pom pom ball
2 straws
Glass Coke cup (or parfait-looking glass).  This one came from Dollar Tree.

Place a small amount of shredded paper in bottom of cup, followed by a carnation (take it off the stem). Continue layers, ending with several carnations.  Insert two straws and top with the "cherry"!  If desired, use hot glue guns to secure the carnations to the paper.

After the centerpieces is used, the cup can still be used as a drinking glass!
Pin It Now!

Monday, October 8, 2012

High Heeled Shoe Plaster Craft

This past weekend was a special ladies' retreat at our Bible camp.  Click HERE to see all about the inspirational and fun retreat.  The retreat theme was "W.I.L.D. - With In the Lord's Design".  High heeled shoes were added to the theme, just for fun.

Finding inexpensive shoe crafts/items wasn't very successful at first.  Eventually we thought of a few ideas that worked out perfectly.
One craft I want to share with you was made with shoe molds ordered from eBay.  It's was a 4-inch mold that had four shoes.  I had two molds to use so did eight shoes at a time.
 The molds were made by using this pottery plaster.  All you add is water.  For 100 shoes it took less than two of these big jugs of plaster (the first container was about half way full and the second has a little bit left.)
The shoes were decoupaged using decorated animal print tissue paper and glossy Modge Podge.
Bling and bows were added, as desired.
It was so much fun seeing everyone's creativity!
We should have had a bow-making session.  This bow on this cute shoe was adorable!
I really like this two-toned animal print shoe!
And this one..... :)
And these..... The Modge Podge is still wet on these, but dries clear and glossy..if you get the Gloss type.  Some of the ladies put a magnet on the back to put on their refrigerator.

The great thing about this inexpensive craft is that it can be adapted to ANY mold and ANY occasion!  


Pin It Now!
 
Pin It button on image hover