Showing posts with label Baby Shower. Show all posts

Thursday, November 20, 2014

Marshmallow Candy Pops

I've done marshmallow pops with chocolate many times before, but never with candy.  A friend was planning to use the pink Candy Melts for something else, but was busy decorating for the baby shower and didn't have the time to make what she planned. I had bought a LOT of big marshmallows for another event and had enough to use for this quick little treat for the baby shower.  I had never actually used the candy melts, so it was fun trying something new!

Melt the candy as directed on the package.  Insert a lollipop stick into a marshmallow, then dip the marshmallow into the melted candy.  Dip into sprinkles, if desired, and allow to harden on waxed or parchment paper.  I used clear crystal sugar sprinkles.  They turned out so cute!  Of course, that pink color may very well be my favorite color, so that helped :).  Baby girl pink is so sweet!  

And, by the way....I have a new great niece, so I got to see baby girl pink just a few days ago!  
Pin It Now!

Monday, February 10, 2014

Black, White, and Purple Baby Shower

I decorate for a lot of things, but as much as I enjoy it, it's so nice to see the decorating of others!  It's refreshing, inspiring, and I always go away thinking, "I never would have thought of that!" :)  That's a GOOD thing! We're all different. We all have different ideas and styles.  And that's why it's so important for everyone to be involved - especially within a church family.
This baby shower was a black, white, and purple theme.  We have the black and white checked tablecloths, so they worked perfectly for the theme.  I really, really like this 3-tired silver tray!  It held beautifully decorated cupcakes.
Decorated tin cans, jars, and other holders held balloons on sticks. I think some of the jars had purple/lavender jelly beans holding the balloon stick in place.
(sorry it's blurry)
Baby Kinsley was certainly "showered" with gifts!  Now, mommy and daddy are just waiting on her arrival!


Pin It Now!

Tuesday, February 5, 2013

Baby Shower Games

At a recent baby shower, we had several games two of the hostesses put together.  This was a guessing game.  Because the gender of the baby wasn't known, it was fun to have a blue and pink guessing game.  Guests wrote down how many items were in the jar.  It included "pink" rattles and pins, "blue rattles and pins, and Q-Tips.

Another fun game (and so sorry I missed getting a picture!) was covering the mother-to-be's eyes and having her put a diaper on the baby doll.  She did a great job!

Other games were found at YeahBaby.com.  Shower games are so much fun!  

Pin It Now!

Thursday, January 31, 2013

Shabby Baby Banner

I've always wanted to make a "shabby" banner, the ones that have strips of torn material and ribbon hanging.  Of course, I realized that stripping the material and tying it would take a little time, but the look makes it all worth it!

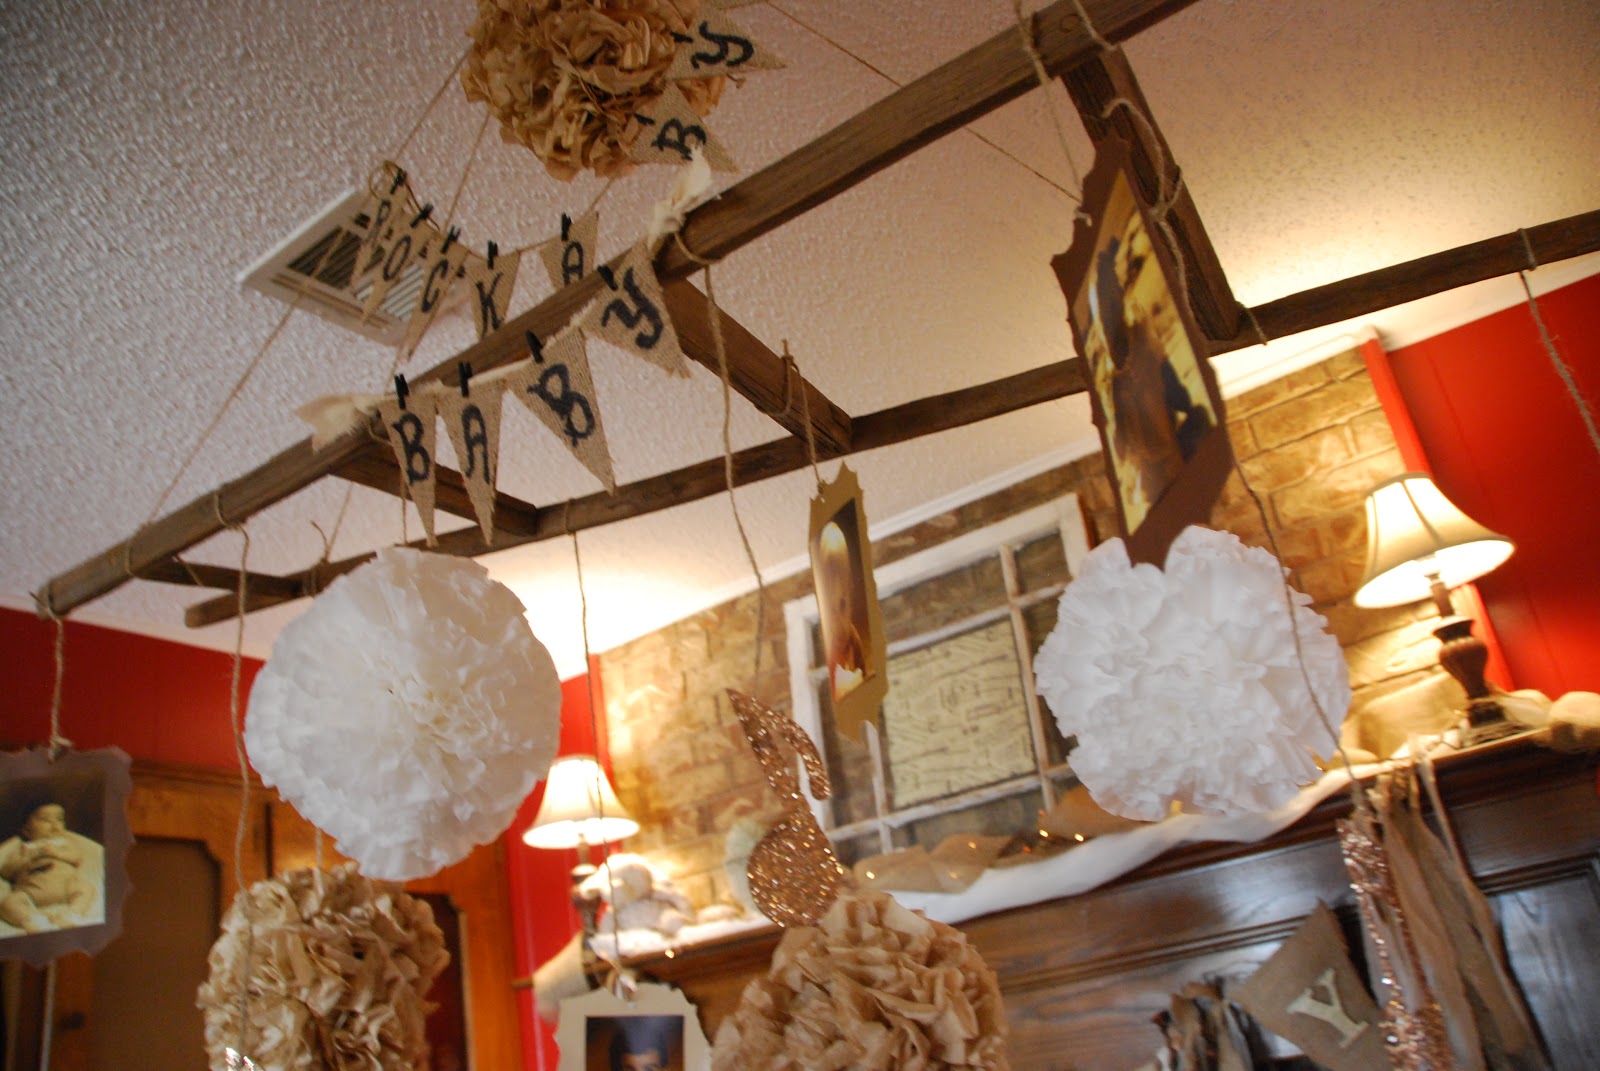
This banner was made for a vintage-music themed baby shower. I was thankful to have the burlap BABY pennant taking up some of the space by the time I had torn and tied a while!
For this banner, I used strips of cut burlap, torn muslin, and other torn thin cotton material, and several varieties of ribbon.  (To tear material, snip it where you want to begin, then tear it all the way to the end of the other side.  Be careful not to tear too fast or it will get wider or thinner!) The pennant was cut from burlap.  I actually cut it double so that the fold is hanging over the jute cord.  I cut a piece of poster board and glued it in between the two layers of burlap - just to make it more sturdy.  The chipboard letters were covered with music-themed scrapbook paper and hot glued to the front of the pennant triangles.

The pennant was hung on the fireplace and went home with the parents-to-be for the baby's room. It will be a sweet addition to their other accessories, plus a reminder of the shower anticipating baby's arrival!
Pin It Now!

Tuesday, January 29, 2013

Coffee Filter Pom Pom Balls

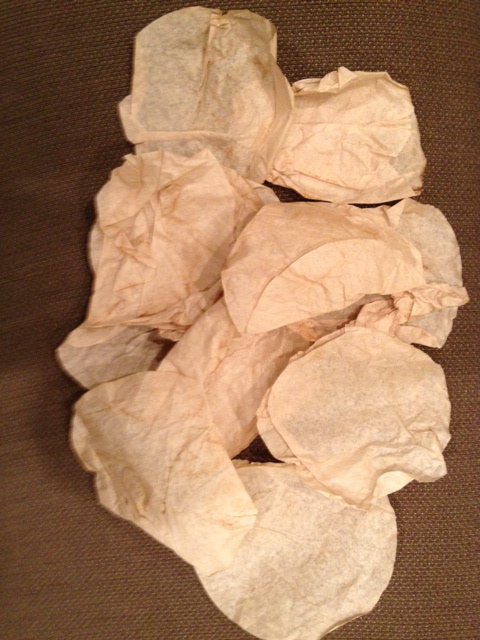
To make vintage looking coffee filter pom pom balls, boil tea bags in a large pot.  Turn off heat and allow the tea bags to set a while.  Place coffee filters in the tea and soak to absorb tea.  I did some for about five minutes and left some in for a day.  
The five minute ones were just ivory colored and the others were as in the picture above and below.  It didn't get any darker, but could have with more tea bags.  Some tea grounds seeped out after a day or so, but it just added colored spots to the filters and made it even neater - so don't worry about that.
Place the wet filters on a cookie sheet or baking pan. It's okay to overlap some, but be sure to pull them apart to hasten drying time.  I put them in a warm oven (to warm setting) for 30 minutes or longer.  Sometimes I would take them out when they weren't completely dry and let them finish drying on the counter.  FYI:  It took over 100 filters to make one pom pom ball!  Thankfully, filters are cheap!
Gather the filter in the bottom center and twist to keep the "flower" in place. I did groups of three together, then secured with a floral pin - which look like a long staple.
This ball was bigger than it appears.  It was big enough so that the floral pin didn't poke out the other side.
For the white pom poms, I just used the filters as they were - without dipping them in a liquid.  If you want them to look more vintage, you could dip them in water, then dry.  I just didn't have the time with the white ones.
Because I used a smaller styrofoam ball for the white pom poms, I used straight pins.  I put three "flowers" together, then inserted them as shown below.
Continue with the filters until the ball is all filled.  Insert a floral pin into the ball, but not all the way down to the ball.  This will be your hanger.  Be sure to wait and do this when you're ready to hang them or tie your string (I used jute) on with the pin....otherwise you might have trouble finding it! (or I would, anyway!)
My pom poms were tied to an old ladder above the table.  A little time consuming, but so much cheaper than the store bought pom poms, plus the vintage look needed for the shower.
Pin It Now!

Monday, January 28, 2013

Mocha Punch

For a vintage-themed baby shower yesterday, we served a pretty colored Mocha Punch.  A friend has this beverage server, which is BEAUTIFUL, and I remembered that at my nephew's wedding they had a Mocha Punch.  My niece-in-law shared the recipe with me so that we could serve it to the guests.  I'm not a coffee drinker, but it's really good!

I'm sharing the two variations of the recipe.  We used the bottom recipe for the shower. FYI:  I didn't read the instructions, so didn't have everything refrigerated in advance.  We cooled it off with ice to speed up the cooling process and it worked just fine!

Mocha Punch

Brewed Coffee (1/2 gallon) - 64 oz
Sugar (1 cup)
Milk (1/2 gallon)
Chocolate ice cream (1/2 gallon)

Instructions:
In a container combine coffe and sugar
Stir until sugar is dissolved
Refrigerate until chilled
Just before serving, pour into a punch bowl
Add milk, mix well
Add ice cream and stir well
(Some recipes added 1 tsp. of vanilla)

Recipe Variation:

20 cups of brewed coffee
1 cup vanilla creamer (liquid)
1/2 cup sugar
1/2 gallon chocolate ice cream
1/2 gallon milk

Follow directions above....

Pin It Now!

Monday, November 12, 2012

Camo Baby Shower

At first, when I heard I needed to decorated for a baby shower in a "camo" theme, I wasn't that excited.  Camo isn't really my thing, and I had nothing to start with.  But as I bought items for the theme, I became more and more excited.
I didn't plan for the orange to go with the theme, but I saw some orange table toppers in a closet in our church's fellowship building and got them out.  Than a friend happened to drop by with some orange table skirts.  The orange seemed perfect!
Just for fun I added some pumpkins.
And burlap.....lots and lots of burlap.  I even found camo printed burlap!  And another friend had more of that printed camo burlap!
So it worked out.  No really "baby-ish", but still cute.  
I found camo printed gable boxes at Canton First Monday.  They looked cute as table centerpieces.
The baby's name was put on a banner and hung from the burlap backdrop.
It's always fun to do something new and different.....especially in decorating.  We look forward to meeting you, baby Alan Wayne!

Pin It Now!
 
Pin It button on image hover