Tuesday, January 31, 2012

Fabulous Feta Salad

Pin It
Posted by Lori: 

This is the third and final new salad I made for last week's school event. This one was delicious, and for sure it will become one of my favorite recipes when needing to take a salad for luncheons or events. I can eat a whole can of Mandarin oranges, anyway, so putting them in a salad makes it that much better, in my opinion!

FABULOUS FETA SALAD
5 ounce package spring-blend salad mix
1/2 cup chopped pecans, toasted
3/4 cup crumbled feta cheese
6 slices bacon, crisply cooked and crumbled
11 ounce can mandarin oranges, drained and halved
Grated Parmesan cheese to taste
Poppy Seed Dressing  (recipe below)

 Divide salad mix equally among four serving plates; top each with equal servings of pecans, feta cheese, bacon and mandarin oranges. Sprinkle with Parmesan cheese; drizzle with Poppy Seed Dressing. Serve immediately. Serves 4. 

***I made the salad in a large bowl, adding the dressing right before serving.

 POPPY SEED DRESSING 
1/2 cup mayonnaise
1/2 cup sugar 1 tablespoons apple cider vinegar
3/4 cup milk
1 tablespoon poppy seed

Whisk together mayonnaise and sugar; whisk in vinegar and remaining ingredients. Add to salad.
Pin It Now!

Sunday, January 29, 2012

Cake Mix Red Velvet Cake

Posted by Donna:

At Christmas, Kimberly made a Red Velvet Cake that started off with a cake mix. One of the mother's where Kimberly teaches made this cake for the teachers, and all the teachers loved it. The mother was kind enough to share her recipe with them. And, Kimberly shared it with me. We had a fellowship meal today after our morning worship service, and I decided to make this cake. It's really, really moist.

Cake Mix Red Velvet Cake

1 butter yellow cake mix
1 small box chocolate instant pudding
1/2 cup oil
1 cup cold water
4 eggs
1 oz. red food coloring

Mix all the ingredients together and beat for about 3 minutes.
Pour into two round cake pans that have been lined with wax paper.

Bake at 350 degrees for 30 minutes.
After the cakes have cooled, frost the top of the first layer--add the second layer---then frost the top and sides of the two.


Frosting:

1 (8oz.) cream cheese, room temperature
1 stick butter, room temperature
2-3 cups powdered sugar
1 tsp. vanilla


This is such a quick version of this cake ----and it's so good. Pin It Now!

Friday, January 27, 2012

Farmer's Wife Salad

Posted by Lori:

Here is another recipe I made for our school's FFA auction/fundraiser this week.  It came from the Gooseberry Patch Quick & Easy Family Favorites Cookbook, as well.  This salad was really good and was almost gone when I went to pick up my bowl.  It's definitely a keeper!  

My sister-in-law mentioned on the bread salad that maybe garden fresh tomatoes would have tasted better to me.  I'm absolutely positive that it would have.  Nothing beats straight from the garden tomatoes!  Too bad our part of the world didn't grow any last summer.  It was too hot, I suppose.  The little tomatoes (sweet cherubs, I think) make an "OK" substitute, but still there is no comparison.  (Makes me excited about planting our garden this summer!)

FARMER'S WIFE SALAD 
(What a cool name for this salad!  If it were me it would say "Goat Man's Wife Salad! :)

1 head broccoli, chopped
1 head romain lettuce, torn
1 pint cherry tomatoes, halved
1 cup mayonnaise-type salad dressing
3 1/2 Tablespoons sugar
1 1/4 Tablespoons vinegar
3/4 pound bacon, crisply cooked and crumbled

Combine broccoli, lettuce and tomatoes in a large bowl.  Combine salad dressing, sugar and vinegar in a separate medium bowl, pour over lettuce mixture and toss to coat.  Sprinkle with bacon.  Chill before serving.  Serves 8.

Recipe submitted by Coli Harrington, Delaware, OH
Pin It Pin It Now!

Wednesday, January 25, 2012

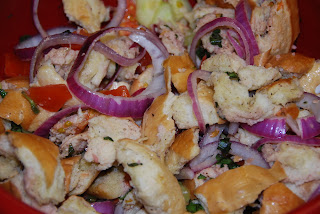
Panzanella Bread Salad

Posted by Lori:

Monday night we had an FFA Chapter event, where officers were asked to bring salads.  Since two of our children are officers, I decided to do three different salads.  I searched through a Gooseberry Patch Quick & Easy Family Favorites' cookbook, looking for some new recipes.  This recipe, for Panzanella Bread Salad caught my eye because of the odd ingredient - bread.  I like cornbread salad (you can find it on this blog.  Search Cornbread Salad.)  I don't ever remember seeing a recipe with bread in it, have you?

Well, I made it, and I ate it.  It was okay, but not great (in my opinion).  Since many of the attendees were teenagers, not a lot of people tried the salad.  But, I'm posting it, just in case someone else might like to try it.  It's definitely different, but I had fun making it!

Panzanella Bread Salad

4 cups Italian bread, torn into bite-size pieces
5 tomatoes, diced
1/2 red onion, sliced
1/2 cucumber, peeled, quartered and sliced
1/2 cup fresh basil, chopped
3 cloves garlic, minced
3 Tablespoons red wine vinegar
1/4 cup olive oil
1/2 teaspoon salt
1/2 teaspoon pepper

Combine first 6 ingredients; toss well. Sprinkle with vinegar, oil, salt and pepper.  Let stand at room temperature 1 1/2 to 2 hours before serving so the bread can absorb the dressing.  Serves 4 to 6.

Submitted to cook book by:  Annmarie Heavey from Bridgewater, MA
Pin It Pin It Now!

Tuesday, January 24, 2012

Potato Soup

Posted by Lori:

 I received this recipe from a friend when I asked (begged) for recipes for the blog last week! I was out of new ones to share and hadn't made anything new in a long time. Thanks, Amber!

Potato Soup

1 can chicken broth and enough water to make about 5 cups liquid
1 pkg frozen O'Brien potatoes
1 can cream of chicken soup
1 can cream style corn
1/2 pound Velveeta cheese, cubed

 Bring liquid to boil and add potatoes. Cook for 10 minutes. Add soup (undiluted), corn, and Velveeta. Simmer and stir until soup and cheese are blended. Amber said she usually adds some shredded chicken breast to hers, but it's good without as well.
  Pin It Pin It Now!

Sunday, January 22, 2012

Picture Frame Craft


Posted by Donna:

A couple of weeks ago, I was "exploring" pinterest and found this craft. I just loved it. I decided to make this and write Larry messages from time to time. After I wrote the first message, I told him the idea was for him to write me messages as well. So far, he has written none!!!! But, that's okay, I've had fun writing his, and I think he has enjoyed them as well. I wrote the one I have posted in the picture this morning before I left for worship services. He has to be at the church building before I do because he does the PowerPoint for the hymns we sing; so, he didn't see the new message until after we got home from worship services. Instead of thanking me, he asked me what I wanted!!!!!! I can't believe he thought I only wrote this because I wanted something in return. Of course, he was just teasing me.

After I made this frame, he told me I should have printed the words that said--I am mad at you because.........that way I could switch them out. Husbands are so funny!!!!!

This is very, very easy to make. After choosing the scrapbook paper you like, print the words --I love you because---on it.

I made a burlap/muslin flower to attach to the frame to dress it up a little. Purchase a dry erase marker and your set to go. Pin It Now!

Thursday, January 19, 2012

Steak Stroganoff

Posted by Lori: 

This recipe was sent to me by a Facebook friend. I haven't had time (lately) to try out any new recipes, so I asked for friends to send me some to share with you. This Steak Stroganoff sounds great and it's a time saver because it can cook in a crock pot. 

I'm assuming that the last minute cooking time is on the stove.

Steak Stroganoff 

Makes 6 Servings......Preparation Time: 15 minutes

Slow Cooker Cooking Time: 3 to 3 1/2 hours on high or 6 to 7 hours on low
Last-Minute Cooking Time: 10 to 15 minutes on high

Place the following ingredients in your Crock Pot or large sauce pan and cook the appropriate length of time:

2 tablespoons all-purpose flour
1/2 teaspoon garlic powder
1/2 teaspoon pepper
1/4 teaspoon paprika
1 boneless beef round steak (about 1 3/4 lb.)
1 can (10 3/4 oz.) condensed cream of mushroom soup
1/2 cup water
1 package (1 oz.) dried onion mushroom soup mix
1 jar (9 oz.) sliced mushrooms, drained
1/2 cup dairy sour cream
1 tablespoon minced fresh parsley
 Pin It Pin It Now!

Applebee's Fiesta Lime Chicken

Posted by Lori:

One of my children's former teachers told me about this great chicken recipe.  She found it on Pinterest. Sounds delicious!  Can't wait to try it!  The recipe comes from http://www.copycatrecipeguide.com/.

Applebee's Fiesta Lime Chicken Ingredients

boneless, skinless chicken fillets
2 cups tortilla chips, crumbled
1 cup Montery jack, colby, or mild cheddar cheese cheese, shredded
Marinade
1/3 cup teriyaki sauce
1 cup water
2 1/2 Tablespoons lime juice
2 Teaspoons garlic
1 Teaspoon smoked paprika
1/2 Teaspoon salt
1/4 Teaspoon ground ginger
Sauce
16 ounces sour cream

Applebee's Fiesta Lime Chicken Recipe

  1. Clean chicken and rinse.
  2. Combine teriyaki sauce, water, lime juice, garlic smoked paprika, salt and ginger in a medium-sized mixing bowl. Opt for fresh lime juice over prepared lime juice for optimal flavor.
  3. Stir marinade until the salt dissolves in the liquid.
  4. Place chicken in marinade and ensure all sides are coated.
  5. Top bowl with plastic wrap and place in a refrigerator.
  6. Flip chicken in marinade after an hour.
  7. Remove chicken after a total of 2 hours marinading.
  8. Combine sour cream and the fiesta ranch seasoning packet in a small mixing bowl. Stir to incorporate the sauce. Refrigerate as needed.
  9. Preheat oven to a high broil.
  10. Preheat grill to high.
  11. Grill each chicken for 3 to 5 minutes on each side until done.
  12. Place chicken on a baking sheet, then coat each with a layer of the dressing mixture.
  13. Top each chicken piece with a thick layer of shredded cheese. If you want to lower calories, minimize the amount of cheese used.
  14. Place baking sheet in the oven and broil for about 3 minutes, or until the cheese is bubbly.
  15. Plate chicken on a half-cup of tortilla strips.
  16. Serve chick with flavored rice and fresh pico de gallo.
  17. Garnish with lime wedges and parsley if desired.

Pin It Pin It Now!

Tuesday, January 17, 2012

Rice Pilaf

Posted by Donna:

A friend of mine shared this recipe with me last week. I haven't made it yet; but, I still wanted to share it. It sounds so good.

Rice Pilaf

1 cup water
1 cup instant rice
1/2 pkg. Lipton dry onion soup
1/4 cup chopped onions
1/2 stick butter (cut in small pieces)
Sliced almonds (optional)

Mix dry soup and rice together. Add water. Stir. Add butter on top.
Bake in a 350 degree oven for 30 minutes.


*I think the 1/4 cup onions could be omitted since the recipe already calls for the dry onion mix. I'm anxious to make this to see for sure. I guess if you really like onions, they should be added, but I would probably prefer it without them. Pin It Now!

Monday, January 16, 2012

Chocolate Chip Cookie Dough Brownies

Posted by Lori:

I made these brownies for my family last week.  I used a brownie recipe that I found with this cookie dough recipe, but none of us cared for it.  It was too dark-chocolaty for us.  We suggest using your own favorite brownie recipe.  Some of my kids, and even my husband, would say just use a boxed variety, but I have two other favorites.  You can find them on this blog....search brownies.

COOKIE DOUGH (EGG FREE!):
3/4 cup butter, at room temperature
3/4 cup light brown sugar, packed
3/4 cup granulated white sugar
3 Tablespoons milk
1 1/2 teaspoons vanilla extract
1 1/2 cups all-purpose flour
1 1/2 cups mini chocolate chips


For drizzle, if desired:
1/2 cup semisweet chips + 1 teaspoon shortening 

Prepare your favorite brownie recipe - homemade or boxed.  Bake brownies and allow to cool.  Top with cookie dough.

Cookie Dough:

In a medium bowl, use an electric mixer to combine butter, brown sugar and white sugar. Mix in milk and vanilla. Mix in flour just until combined. Stir in chocolate chips.  Spread cookie dough over the cooled brownies. Refrigerate until the dough is quite firm. It's okay to speed up the process and place it in the freezer too. The firmer the dough, the easier it will be to cut into neat squares. Use a sharp knife to cut the brownies. You may need to wipe the knife off with a paper towel in between cuts since the fudgy brownies and cookie dough will tend to stick to the knife a bit. 

4. If desired, drizzle chocolate on top.  Melt 1/2 cup chocolate chips with 1 teaspoon of shortening in the microwave.  Stir until smooth. Scoop the melted chocolate into a zip baggie and snip off the corner. Squeeze the bag to drizzle the chocolate on top of each brownie. Sprinkle additional chocolate chips on top, if desired.

Pin It Now!

Thursday, January 12, 2012

Gingerbread Men Ornaments

Posted by Donna:

Last week I mentioned that I would post about the other homemade gift I made for Lori and Kimberly. When the girls were small, I made small felt ornaments like this. I sewed while they stuffed. The ones I made then were smaller, and I used felt for the buttons and face features. My Christmas tree decorations haven't changed much over the years. I use the same gingerbread ornaments and the same gingerbread paper garland. I have added red balls, cloth bows, and several ornaments that have been given to me through the years; but other than that, it's the same tree. Every year I think I should change it, but I love my gingerbread men that the girls and I made. A lot of memories are in those gingerbread men.

Lori commented a year or so ago how much she loved the gingerbread men that she, Kimberly, and I made; so, that's when I decided to make some for her and Kimberly. I only have 19 of those--not enough for the girls to share. I had planned on making each one of them 20, but by the time I made a few of them, I was just about to pull my hair out!!!! Instead of using felt for the buttons and face features, I decided I should use buttons. I knew they would last longer. The small rickrack is what got me----I'm older now, and sewing that teeny tiny rickrack on was harder this time around. A good friend of mine told me I should have glued it on, but I wanted everything to be permanent. I ended up making twelve for each of them. Now, they can share what I have, plus what they have.

I try to make them something every year or every few years. Last year I made them Mr. and Mrs. Claus pillowcases with jingle bells on them. I don't think I ever posted about that.

Well, that's the end of my homemade gifts for Christmas of 2011. Now, I've got to get busy thinking of what to do next year!!
*Note from Lori: She put them in these cute little sewn bags, too!  Fun idea!
Pin It Now!

Wednesday, January 11, 2012

TV Dinner Cupcakes

Posted by Lori:

A couple of nights ago during a basketball tournament, one of our school's academic clubs had a silent auction as a fund raiser.  Parents were asked to bring baked items for the fundraiser.  This TV Dinner was absolutely adorable!  I had never seen it before!

Below is a link about the cupcake book this TV Dinner "recipe" came from.  It isn't a Martha Stewart recipe, but Martha hosted the author of the cookbook.
http://www.marthastewart.com/260350/tv-dinner-cupcakes

The lady who made these recently moved to our small town.  I'm so thankful that she did!  Now we are being blessed by her talents and support for our school, and we appreciate it very much!
Pin It Now!

Monday, January 9, 2012

Fried Bologna Sandwiches


Yesterday our three boys were busy working in one bedroom, helping move two of them into their new bedrooms.  The youngest, Tyler, (aka Biscuit from The Chronicles of Biscuit in my other blog) wasn't working very hard and the two older ones were getting a little aggravated at him.  Finally, after hearing too many "discussions" coming from the bedroom, I hollered (yes, that's how we do it around here :) for Tyler to come to the kitchen.

When he got to the kitchen, I said, "Tyler, if you don't start helping your brothers, you're not going to get the special treat your daddy is bringing you home from the store!"  He asked what it was.  I said, "Bologna!"  His eyes got big and he was soooooo excited!  So were the other boys when they found out!  It was so funny just how excited they got about something so simple as a package of lunch meat!  

Typically we don't buy bologna.  The kids eat it from time to time at church finger-food-type fellowship meals or VBS or their grandparents' house.  It was also neat for them because we also had another rare "treat" in their eyes:  white bread!  And it was Wonder, my childhood favorite.  We usually eat only 100% whole wheat!

So, since the boys were so excited, I told them that after worship Sunday night, I would make them fried bologna sandwiches.  I made a big deal about it.  I told them my dad would make them when I was little and how it was cooked a special way and all.....really played it up to be big.  One of the boys even asked if I would be breading it....like chicken fried steak!!! (Wishful thinking on his part :).


I got a huge kick out of showing the kids how to slit the bologna, so it wouldn't puff up too much in the middle.  
I nicknamed the bologna PacMan, since it looked like the PacMan on the video game.  
PacMan grew.....
....and grew.....
.....and grew!  He got a little puffed up, but not too much! :)
I made the boys, plus my daughter and husband their fried bologna sandwiches, then called my dad to tell him the good news about his grandkids enjoying one of his still-to-this-day favorite treats!  
He mentioned when he used to get huge cuts of bologna and grill it on the grill!  I do remember that, but don't think I'll be doing it!
Dad said to tell the boys and our daughter that they were enjoying a delicacy! 
Who knew a fried bologna sandwich was a delicacy???!
What a simple thing that the boys were excited about!  What a fun (and funny!) memory!
Pin It Now!

Sunday, January 8, 2012

Quick Fudge

Posted by Donna:

My aunt shared this recipe with me over the Christmas holiday. She said it's not as good as the marshmallow fudge that everyone fixes; but, when you're really craving fudge this is a quick fix. I've heard her mention making this several times during the year.


Quick Fudge

1 can Eagle Brand
12 oz. semi-sweet chocolate chips

Microwave for about 4 1/2 minutes, stirring every minute. Once melted, add the pecans.


Simple, isn't it?

I haven't made this yet, but every recipe she's ever shared with me has been very good. I'm sure I would like this as well. I'm trying to "lay low" on sweets for a while. Pin It Now!

Thursday, January 5, 2012

Heirloom Pillow

Posted by Donna:

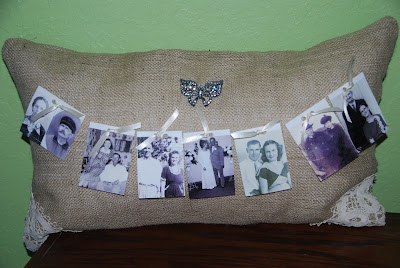
I wanted to share one of the home-made gifts I made my girls this Christmas. I had seen a similar pillow at one of my very favorite stores in Oklahoma City. This gave me the idea to do this one, but use pictures of their grandparents and great-grandparents.

A couple of years ago, I decided I wanted pictures of all the grandparents when they were very young and first married. It took me a while and several letters to relatives to come up with two or three of the pictures.

To do the pillow, I had Larry scan and print each picture onto a wallet size photo.
The doilies on the two corners were hard to find. I knew what kind of doilie I wanted, but finding each one was hard. The first I found here locally, but the second one I found in an Antique Store in Wichita Falls, Texas.

I also wanted vintage brooches above the pictures. I really wanted to use some of my mother's, but she only had one that would work and I wasn't going to choose who should have it. After searching several stores, I finally located the two vintage butterflies at Hobby Lobby.

I used a pillow form for the pillow. The ribbons were tacked on, then tied to each picture.

These pillows can be used in so many ways. anniversary gifts, wedding, birthdays, etc. So many possiblities---

Just to let you know--- The pillow that I saw had a price tag over $100.00. I was shocked. Believe me, it only took about $12.00 of materials to make; but since I'm not a great seamtress, I told Larry I might charge that much to make one for someone else!!!!!! It was a very trying project to figure out exactly how I wanted it to look. After it was finished, though, I couldn't wait to give it to the girls---regardless of all the mess ups on each one. I love making keepsakes for them.

I'll share another project I made for them in a day or so.

Pin It Now!

Wednesday, January 4, 2012

Nutella Brownies


Posted by Lori:

Do you like Nutella??  Here is a great recipe using Nutella!  I look forward to trying this soon.  Thanks for the recipe, Renee!

Nutella Brownies

1 1/4 cup sugar
1 cup Nutella
1 cup flour
1 - 2 eggs (Mix one and if too dry, add another one)

Mix ingredients together in medium sized bowl.  Spoon batter into 9 x 13 (I assume greased) pan. Bake in preheated 350 degree oven for 12 minutes or until center is done (like regular brownies.)

Pin It Now!

Tuesday, January 3, 2012

Hot Buffalo Chicken Dip

**Note from Lori:  Mom and I posted at the same time yesterday, so if you didn't see this one of hers before, we're sending it out again!  Sorry about that!

Posted by Donna:

A couple of years ago, we were visiting some friends from church. Their daughter had made a very good hot dip that we really liked. I asked for the recipe, but her mother wasn't for sure which one her daughter had made. I found this recipe on allrecipes that sounded pretty much like what her mother was suggesting it could have been. Whether it was the same thing or not, most of the adults and the older grandchildren really liked it.

Hot Buffalo Chicken Dip

2 (10 oz.) cans chunk chicken, drained
2 ( 8oz.) pkg. cream cheese, room temperature
1 cup Ranch dressing
3/4 cup pepper sauce, or to your liking
1 1/2 cups shredded cheddar cheese

Heat the chicken and hot sauce until heated through. Stir in the cream cheese and ranch dressing. Stir and cook until the cheese is melted. Mix in the half the cheddar cheese. Once the cheese is blended and melted somewhat, put into a crock pot. Sprinkle the rest of the cheese over the top. Cover and cook on low until ready to serve. Serve with chips, crackers or vegetables of your choice.

When I made this, I only had 15 oz. of chicken; so, I had to adjust all the ingredients, but you really can't go wrong. I think I added a little more hot sauce than called for just because I know how "men" like the stronger flavor. I liked it even better when it was heated up later for leftovers after it had been sitting in the fridge for a few hours.

One thing for sure, it is definitely a keeper for my "sandwich" meals. Pin It Now!

Monday, January 2, 2012

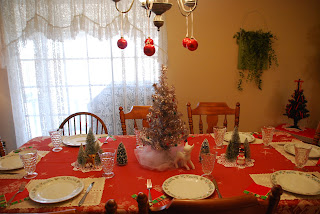
Christmas at Mom and Dad's 2011

Posted by Lori:
I always enjoy visiting Mom and Dad's house, but Christmas Day and this weekend I noticed just how pretty and "homey" it really was. 
She has lots of antique things that have been passed down from my grandparents and even great-grandparents, but also lots of things that have been give to her through the years.
I decided to share some of the sweet and sentimental pictures with you...just to brag on her....because I know she never would!  
I'll give Dad some credit, because I have heard that he's pretty good at helping her straighten up and even clean some!  I don't think he would get any of the decorating credit, though :).
These little snowmen were gifts from one of her piano students a few years ago.  They've got a vintage style.  So unique!
When my sister was born, it was at a time when children couldn't visit in the hospital.  I bought her a sock money and sent it up with my grandma.  Since then, I've always liked sock monkeys!  Mom's sock monkey is so sweet!
So thankful mom and dad have these pictures of my grandparents and great-grandparents!
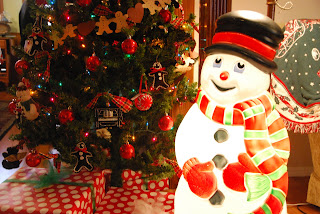
This gingerbread tree has pretty much been the way my mom's tree has looked for almost all of my life!  There have been a few ornament additions, but not too many.  I remember mom sewing the little felt gingerbread men when I was little.  This year she made Kimberly (sister) and I a set of our very own!  She didn't want us to fight over hers some day (hee hee!).
This light-up snowman reminds me of the Snoopy we had when I was little.  
Light up reindeer....
Our family's stockings at my parent's house.
Kimberly and I made mom and dad these stockings several years ago.  Search "stockings" on our homepage to find out how we made them. (She gets most of the credit.  Sewing's not my thing :).
More of the stockings....
More displays of Christmas.
So cute and simple!
Mom found this little metal red truck at Hobby Lobby.  For Christmas, it held metal cookie cutters.  The bell lights were my grandma's (I'm pretty sure).
Glowing....
More of the sock monkey tree.
Mom's handmade felt gingerbread men.

Thanks for the special Christmas memories of 2011, Mom and Dad!  
We love you and appreciate you both!
Pin It Now!
 
Pin It button on image hover